
How to Choose and Detail the Right Natural-Stone Wall System
Compare structural, dry-stone, adhered veneer and anchored cladding, with guidance on stone tests, mortar compatibility, drainage and historic repair.
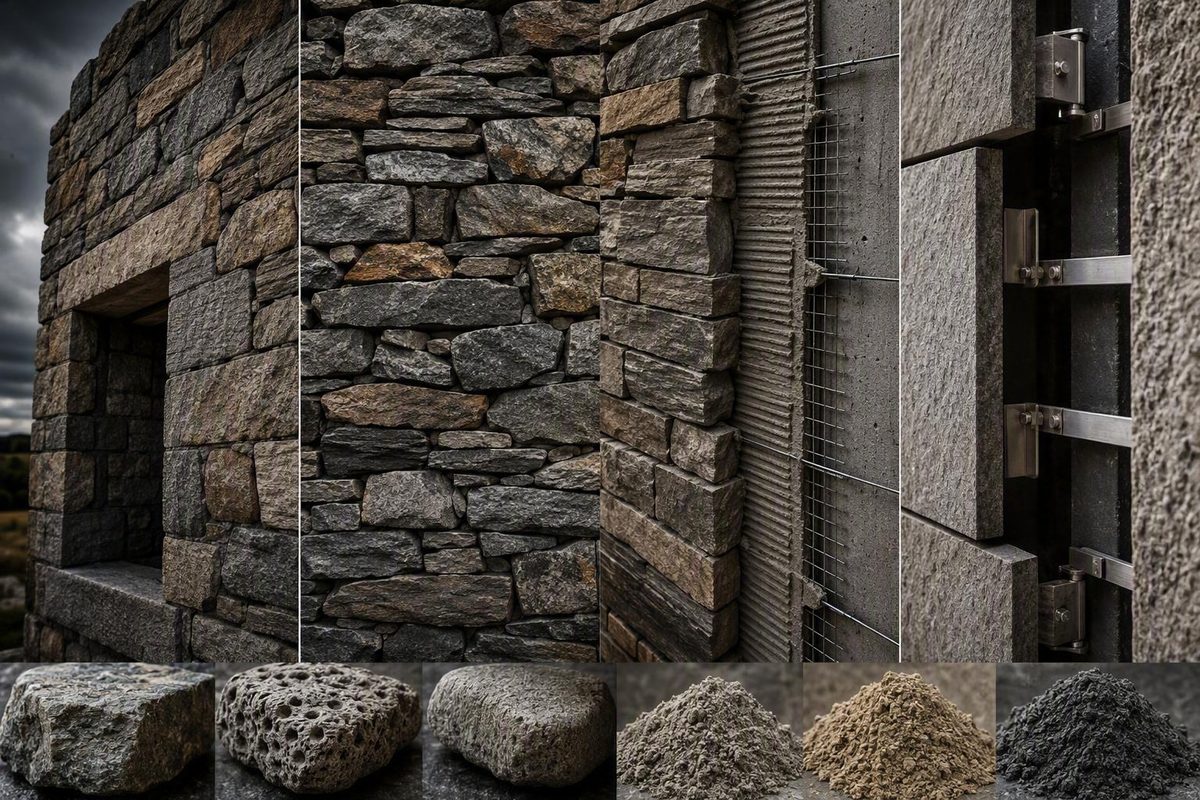
Stone masonry is not one construction method.
Choose the system before choosing the stone or mortar. Identify whether the stone is structural, self-supporting, adhered, or anchored; define its exposure and substrate; determine whether historic requirements apply; and then coordinate material testing, mortar compatibility, water management, workmanship, and approvals.
What stone masonry is—and what the term includes
Stone masonry involves selecting, shaping, arranging, fixing, or repairing natural stone in buildings, structures, landscape work, monuments, and sculpture. It differs from brick or concrete-block masonry primarily in the material used for the units. That distinction does not make one form of masonry universally stronger or more durable than another.
The craft can include:
- Extracting blocks from a quarry
- Sawing blocks into slabs, billets, or rough components
- Shaping and finishing pieces in a workshop
- Installing prepared stone on site
- Building or repairing walls, paving, steps, fireplaces, and monuments
- Cutting inscriptions and carving ornamental or sculptural work
Traditional terminology separates several of these roles. A quarryman extracts stone blocks, a sawyer cuts large blocks, a banker mason shapes components at a workshop bench, and a fixer mason installs prepared pieces. Memorial masons and carver masons specialize in inscriptions and decorative or sculptural work. These craft roles are summarized in an overview of stonemasonry.
Contemporary construction includes traditional and engineered systems. Stone may form a load-bearing wall, remain stable without mortar in dry-stone work, be mortared into ashlar or rubble construction, adhere to a supporting wall as thin veneer, or hang from engineered anchors as dimension-stone cladding.
Appearance does not establish which system is present. A wall with a nearly mortarless, “dry-stacked” appearance may be adhered veneer over a framed or masonry substrate. It should not be assumed to behave like a freestanding traditional dry-stone wall.
Although stonework also includes paving, monuments, fireplaces, and sculpture, the remainder of this article focuses primarily on walls, veneers, and cladding systems.
Stone masonry types: a system-selection table
Stone classifications often combine visual descriptions with construction methods. Ashlar and rubble, for example, describe the preparation and arrangement of stone more than they define a wall’s load path. A dressed ashlar face may conceal a backing wall, while irregular rubble may be structural, veneered, or used in landscape construction.
The following companion tables separate appearance and role from attachment, drainage, and design responsibility.
| System | Defining feature | Typical role |
|---|---|---|
| Ashlar masonry | Dressed or cut units arranged in deliberate courses or patterns | Structural work, facing, veneer, or cladding |
| Rubble masonry | Less regular units arranged in coursed or uncoursed work | Walls, foundations, landscape construction, or facing |
| Traditional dry stone | No mortar; stability develops through stone shape, placement, compression, and friction | Freestanding walls, boundaries, terraces, and some landscape structures |
| Mortared load-bearing stone | Stone and mortar participate in carrying structural loads | Walls, piers, foundations, and historic construction |
| Adhered thin-stone veneer | Stone is bonded to a supporting wall and does not carry the building’s primary loads | Interior or exterior finish |
| Mechanically anchored dimension stone | Cut panels or units are held by an engineered support or anchoring system | Interior or exterior cladding |
| System | Mortar or attachment | Drainage concern | Required design input |
|---|---|---|---|
| Ashlar masonry | May be mortared, adhered, or anchored | Depends on the underlying assembly and exposure | Establish support, load path, movement, and enclosure details |
| Rubble masonry | May be dry-laid, mortared, or used as facing | Depends on wall type, exposure, and backing | Resolve placement, support, geometry, and workmanship criteria |
| Traditional dry stone | No mortar or concealed veneer bond | Water behavior differs from that of backed veneer walls | Establish suitable support, geometry, and project-specific stability criteria |
| Mortared load-bearing stone | Mortar forms part of the masonry construction | Coordinate water entry and drying with the complete wall | Address foundations, openings, movement, wall geometry, and structural loads |
| Adhered thin-stone veneer | Bonded with a compatible installation system | Exterior work needs a coordinated drainage strategy | Select the system for the substrate, exposure, and applicable instructions |
| Mechanically anchored dimension stone | Supported by engineered anchors or attachment components | Coordinate joints, cavities, flashing, and drainage paths | Design for panel support, movement, applicable wind and seismic effects, and the supporting structure |
The ashlar label does not establish structural capacity, and irregular rubble is not automatically load-bearing. Likewise, supplier instructions for an adhered product apply only to the identified product and configuration; they are not universal code provisions.
Mechanically anchored cladding creates a distinct load path. Panel dimensions, anchors, joints, movement, and backing conditions therefore have to be resolved together under the governing project documents.
Before selecting a system, answer six questions:
- Is the stone structural, self-supporting, adhered, or anchored?
- Is the application interior or exterior?
- Is the stone on a vertical, horizontal, freestanding, or retaining surface?
- Is existing fabric historically significant or subject to preservation review?
- What substrate, structure, or foundation supports the stone?
- What appearance, bond, coursing, joint profile, and finish must the completed work achieve?
Select stone by application, exposure, and test data
A commercial name, showroom sample, or successful installation in another climate does not establish suitability for a new project. Selection should reflect the proposed use, loads, exposure, absorption, relevant strength properties, abrasion where applicable, unit dimensions, substrate behavior, finish, and attachment method.
The useful test is the one connected to a plausible project failure. The following methods and scopes are identified in the Natural Stone Institute’s guide to ASTM standards for natural stone.
| Property or assembly | ASTM method | When it may matter | Failure question investigated |
|---|---|---|---|
| Absorption and bulk specific gravity | C97 | Exterior exposure, wet locations, or material comparison | How readily does the stone absorb water, and what is its bulk density? |
| Compressive strength | C170 | Bearing applications or concentrated compressive demands | Could the stone fail under the relevant compression? |
| Flexural strength | C880 | Panels, overhangs, or other bending-sensitive units | Can the unit resist bending under its proposed support conditions? |
| Modulus of rupture | C99 | Comparative bending evaluation of dimension stone | At what bending stress does the specimen rupture? |
| Abrasion resistance | C241 or C1353 | Floors, stairs, paving, and other foot-traffic surfaces | Is traffic likely to wear the surface excessively? |
| Exterior cladding-system performance | C1201 | Exterior dimension-stone cladding assemblies | How does the tested assembly respond to a uniform static air-pressure difference? |
| Individual anchorage strength | C1354 | Mechanically anchored stone | How strong is the tested stone-and-anchor configuration? |
| Exterior anchor-system guidance | C1242 | Exterior dimension-stone anchoring | What considerations apply to anchor selection, design, and installation? |
| Exterior stone-selection guidance | C1528 | Exterior dimension-stone applications | What factors should inform material selection for outdoor service? |
Abrasion testing generally belongs to walked surfaces, not inaccessible vertical stone. Conversely, façade panels may need flexural, cladding-system, or anchorage evidence that would not answer a flooring-wear question.
Begin with quarry or supplier data traceable to the proposed stone. An independent laboratory can test representative stone when suitable source data are unavailable.
An ASTM designation is not approval of a stone or assembly. It does not establish that the reported values satisfy project criteria, that the test configuration matches the proposed installation, or that the work complies with the governing code. Confirm the current official standard, the edition incorporated into the code or contract, the project’s acceptance criteria, and any applicable evaluated installation instructions.
Mortar compatibility matters more than a universal mix
There is no universal stone-masonry mortar. New adhered veneer, load-bearing work, landscape construction, and historic repointing impose different demands. Mortar selection depends on the stone, exposure, substrate, joint geometry, installation system, and governing documents.
Mortar contains a binder, aggregate—usually sand, and water. The binder contributes setting and hardened properties. Sand provides most of the mortar’s volume and strongly affects color, texture, cohesiveness, workability, and durability. Water produces a workable mixture and supports the binder’s reactions.
For historic masonry, replacement mortar should generally match the original color, texture, sand characteristics, tooling, and joint profile while remaining physically compatible with the stone and surviving mortar. National Park Service repointing guidance advises that replacement mortar be softer in compressive strength and more vapor-permeable than the masonry units, and as soft and permeable as—or softer and more permeable than—the historic mortar.
Mortar that is too strong can concentrate movement-related stress in the stone rather than accommodating it in the joint, contributing to cracking or spalling. Dense, relatively impermeable mortar can impede moisture migration and contribute to salt crystallization, spalling, or delamination within masonry units. Hardness and permeability are not interchangeable properties; an old mortar can feel hard while remaining comparatively vapor-permeable.
Relevant references include ASTM C144 for masonry-mortar aggregate, C207 for hydrated lime, C91 for masonry cement, and C270 for mortar for unit masonry. These are references, not automatic recipes. Their current editions, applicability, material options, and project acceptance criteria still need to be established.
Preservation guidance discusses a commonly specified 1:3 binder-to-sand proportion in the context of well-graded sand and historic repointing. It is not a mandatory universal mix; historic evidence, sand grading, binder selection, stone properties, exposure, workability, and appearance may justify another approach, as the National Park Service’s Preservation Brief explains.
Buechel Stone, a commercial supplier, demonstrates Type S mortar for one natural thin-stone veneer installation in its veneer workmanship guidance. That example does not make Type S universally appropriate for adhered veneer, structural stonework, or historic repointing.
Water management, joints, and exterior detailing
Exterior stone performance is a wall-system issue.
This is particularly important when veneer has a drystacked appearance. Tight-fitting stones may expose almost no mortar, but water can still enter through joints, openings, penetrations, copings, and transitions. The concealed wall needs the drainage strategy appropriate to its substrate and installation system. Traditional dry-stone construction is different because it does not involve an adhered veneer over a backing wall.
Common joint appearances include:
- Raked joint: Mortar is recessed behind the stone face, emphasizing individual units and shadow lines.
- Flush joint: Mortar finishes close to the face without covering the stone.
- Overgrout joint: Mortar extends over portions of the stone edges or faces, producing a heavier and more continuous appearance.
- Drystacked appearance: Stones fit closely, with little or no visible mortar.
Joint profile and consistency influence appearance and exposure, but no joint style replaces flashing, drainage, compatible materials, or sound installation. Recessed joints expose more of the stone edge and create deeper shadow lines, while broad overgrout joints can dominate the finished color and texture. A representative mockup is the most reliable way to judge these effects with the actual range of stone and mortar.
Bond and pattern also affect visual quality. Vertical joints should be staggered rather than allowed to run conspicuously through several courses. Irregular work should avoid oversized triangular mortar pockets where incompatible shapes meet.
As product-specific practical guidance, Buechel Stone describes a roughly 1/2-inch average joint, recommends about 4 inches of separation between vertical joints, and advises tooling at a consistent “thumbprint-hard” stage. These are supplier recommendations to evaluate through the project specification and approved mockup, not universal requirements.
Current dimension-stone publications cover vertical installation systems, anchorage, continuous-insulation components, and thermal separations. The Natural Stone Institute’s resource library identifies such resources, but a library listing or typical detail does not replace the full governing documents or project-specific work of the responsible architect, enclosure consultant, structural engineer, or specialty designer.
Historic stone masonry: diagnose before repointing
Repointing is a joint repair, not a cure for every masonry problem. Installing new mortar before investigating deterioration may temporarily conceal symptoms while leaving roof leaks, defective gutters, settlement, rising damp, drainage problems, or severe exposure unresolved.
A useful diagnostic sequence is:
- Document the symptoms. Map open joints, cracks, displaced units, damp areas, staining, biological growth, spalls, and previous repairs.
- Investigate water and movement. Examine roofs, parapets, gutters, downspouts, flashing, drainage, grade, foundations, openings, and weather exposure.
- Study representative materials. Record stone type, size, shape, finish, bond, bedding orientation where relevant, and variations in the original mortar.
- Test to answer defined questions. Use laboratory analysis only where it can clarify the existing materials, deterioration, or proposed repair.
- Develop trial repairs. Prepare sample areas or mockups demonstrating cleaning, joint preparation, mortar placement, tooling, color, texture, and recess depth.
- Evaluate before broad installation. Review trial work after representative drying before approving the remaining work.
Mortar analysis can range from visual and physical examination to acid digestion. Specialized investigations may use thin-section microscopy, scanning electron microscopy, X-ray diffraction, or differential thermal analysis.
These methods have limits. Exact replication may be impossible because historic ingredients varied or are no longer available. Acid digestion can confuse carbonate binder with carbonate aggregate, and instrumental methods require specialized equipment and experienced analysts.
| Symptom | Possible issues to investigate | Logical next step |
|---|---|---|
| Open or eroded joints | Weathering, incompatible repairs, concentrated water, or normal mortar loss | Map the extent, inspect water sources, and compare sound and failed mortar |
| Cracking | Thermal or moisture movement, settlement, corrosion, restraint, or impact | Record the pattern and changes over time; refer unexplained movement for structural assessment |
| Spalling or delamination | Dense mortar, retained moisture, salts, freeze-thaw exposure, incompatible repair, or weak stone | Investigate moisture and salts; identify the stone and mortar before treatment |
| Staining or efflorescence | Water pathways, soluble salts, metal runoff, biological growth, or cleaning residues | Trace moisture and runoff before choosing cleaning or repair methods |
| Displacement or bulging | Foundation movement, inadequate bonding, deteriorated ties or anchors, or loss of support | Obtain a qualified façade or structural assessment |
| Recurring dampness | Roof, gutter, flashing, grade, drainage, condensation, or rising moisture | Locate the moisture source before repointing |
Historic matching involves more than color. Stone size, shape, integrity, finish, bond, bedding, mortar texture, permeability, tooling, and recess depth can all affect compatibility and character.
A draft agreement for work at Suitland Parkway shows how project-specific preservation controls may be framed. It proposed cleaning and securely stockpiling salvaged stone, obtaining comparable replacements where needed, resetting the existing bond, using compatible mortar, and approving bonding-pattern and mortar samples before installation. These were proposed obligations for that project, not a general specification, but they illustrate the level of control that preservation work may require in the Suitland Parkway draft memorandum.
Projects participating in preservation, tax-credit, or agency-review programs should identify applicable requirements before design is finalized. The National Park Service indexes the Secretary of the Interior’s Standards and related preservation guidance; applicability depends on the property, jurisdiction, funding, approvals, and program.
A preconstruction checklist for stone masonry
Use this checklist before purchasing stone, releasing fabrication, or beginning installation.
Scope
- [ ] Classify the work as structural masonry, traditional dry stone, mortared nonstructural work, adhered veneer, mechanically anchored cladding, landscape construction, or historic repair.
- [ ] Define whether the application is vertical, horizontal, freestanding, backed, or retaining.
- [ ] Record interior or exterior exposure and known sources of water, salts, abrasion, impact, heat, or soil contact.
- [ ] Establish whether existing stone, mortar, bond, tooling, or other historic fabric must be retained or matched.
- [ ] Separate appearance terms such as ashlar, rubble, and drystacked from the actual support and attachment system.
Material evidence
- [ ] Record the stone’s commercial designation, quarry or source, and supplier.
- [ ] Seek geological or petrographic identification when commercial naming is uncertain, source verification is important, historic matching is required, or deterioration is being investigated.
- [ ] Request test reports for properties connected to the intended application.
- [ ] Confirm that reports represent the proposed source and material range rather than an unrelated stone with a similar name.
- [ ] Review expected variation in color, veining, inclusions, texture, and finish using multiple full-size samples.
- [ ] Confirm dimensions, tolerances, finish, edge treatment, bedding orientation where relevant, and replacement availability.
- [ ] Arrange independent testing when source data are inadequate or the project specification requires verification.
Wall-system design
- [ ] Identify the foundation, frame, backup wall, sheathing, lath, or other substrate associated with the proposed system.
- [ ] Have the responsible designer establish the load path for self-weight and applicable lateral loads.
- [ ] Determine which drainage planes, flashing, cavities, weeps, copings, sills, penetrations, and terminations apply to the assembly.
- [ ] Define anchors, ties, support components, adhered-setting materials, or other attachments through the governing design documents.
- [ ] Address structural, thermal, moisture-related, and differential movement where applicable.
- [ ] Coordinate interfaces with insulation, air and water barriers, sealants, and adjacent materials.
- [ ] Ask the responsible design team whether inspection or maintenance access is needed for the selected system.
Workmanship
- [ ] Approve trial mortar mixes for physical compatibility as well as color and texture.
- [ ] Establish sand appearance, joint width, profile, tooling, recess depth, and acceptable variation.
- [ ] Define bond, coursing, corner treatment, joint staggering, and limits on conspicuous mortar pockets.
- [ ] Build representative mockups that include corners, openings, transitions, interfaces, and the full stone range.
- [ ] Review mockups after the mortar and stone have dried sufficiently to show representative color.
- [ ] Confirm procedures for handling, cutting, cleaning, protecting, cataloging, and storing stone.
- [ ] Review the mason’s relevant previous work rather than relying only on general construction experience.
Approvals and responsibilities
- [ ] Identify the current locally adopted code and standards incorporated by reference.
- [ ] List exact standard editions and test acceptance criteria in the project documents.
- [ ] Confirm which manufacturer instructions apply to the selected product, substrate, and configuration.
- [ ] Establish submittal, mockup, testing, inspection, field-observation, and acceptance requirements appropriate to the project.
- [ ] Assign structural, anchorage, enclosure, façade, preservation, and laboratory questions to appropriately qualified specialists.
- [ ] Record historic-review conditions, agency approvals, salvage requirements, and documentation procedures before demolition or cleaning begins.
Those conditions require project-specific assessment under the governing documents by appropriately qualified professionals.
The decision rule has four parts: identify the stone system; define its structural role and exposure; verify stone and mortar compatibility with application-relevant evidence; and coordinate drainage, attachment, mockups, and approvals before installation. Successful stone masonry comes from matching materials and details to the actual assembly—not from selecting stone by appearance or applying one mortar recipe everywhere.