
The Right Roof Deck Depends on More Than a Fraction of an Inch
Rated 1/2-inch plywood at 16-inch centers and 5/8-inch plywood at 24-inch centers are reasonable starting points, but neither is a complete specification.
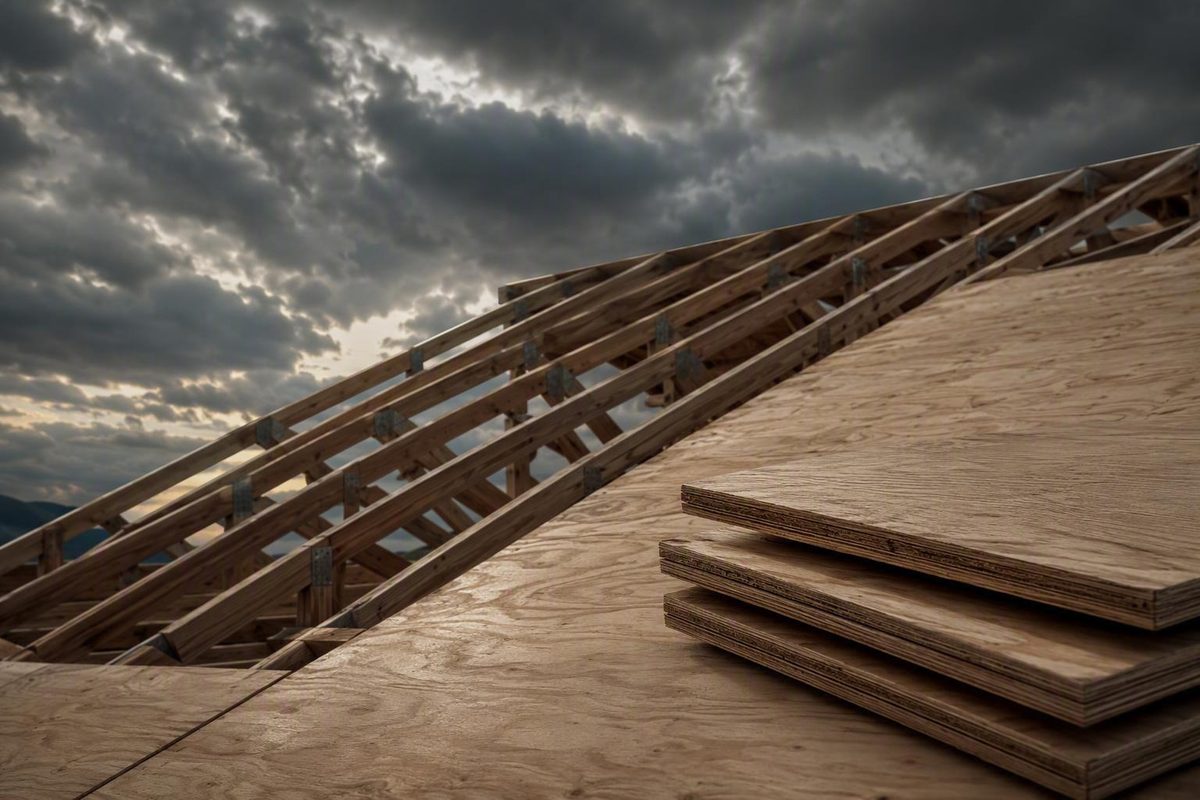
Quick answer: 1/2 inch is common, but 5/8 inch may provide a stiffer deck
Nominal thickness alone cannot determine whether plywood is suitable for a roof. Start with rafter or truss spacing and the complete panel stamp. Then verify design loads, panel orientation, edge support, fastening, locally adopted code, and roof-covering instructions.
For conventional light-frame roofs, these field conventions are useful starting points:
- Supports at 16 inches on center: Rated 1/2-inch plywood is commonly considered when its grade and span rating fit the framing and loads, and the code and roof-covering manufacturer permit it.
- Supports at 24 inches on center: 5/8-inch plywood is often favored because the thicker panel generally provides greater stiffness and less deflection. That is a practical preference, not a universal requirement.
- Unusual spans or loads: A spacing-based rule of thumb is insufficient. High snow, high wind, heavy tile or slate, unusual geometry, and nonstandard assemblies require project-specific verification.
Commercial and trade guidance supports the 1/2-inch-at-16-inches and 5/8-inch-at-24-inches conventions, but does not establish them as universal code requirements. One Ontario lumber supplier, for example, recommends 1/2-inch plywood at 16-inch centers and prefers 5/8 inch at 24-inch centers, particularly where snow-related deflection is a concern. Its recommendations are regional field guidance rather than engineering or code determinations.
Keep three different decisions separate:
- Minimum permitted: The thinnest rated panel allowed by the governing requirements for the actual configuration.
- Common field choice: A thickness regularly selected for conventional framing and loads.
- Optional upgrade: A thicker compliant panel selected for greater stiffness, less flex underfoot, or a flatter substrate.
Some prescriptive tables list rated panels as thin as 3/8 inch in narrowly defined configurations. For example, a third-party reproduction of Illinois Building Code 2021 Table 2304.8(3) lists certain 3/8-inch wood structural panels at specified ratings, spans, loads, orientations, and edge-support conditions. That does not establish 3/8 inch as a national minimum or make generic, unrated, or incorrectly installed 3/8-inch plywood suitable.
The practical takeaway is straightforward: rated 1/2-inch plywood at 16 inches on center and 5/8-inch plywood at 24 inches on center may be reasonable starting points, but neither is a complete specification.
What thickness does—and does not—tell you about a roof panel
Roof sheathing, also called roof decking, is the panel layer fastened directly to rafters or trusses. It provides the substrate for underlayment and the finished roof covering and forms part of the structural roof assembly.
Plywood and oriented strand board are both wood structural panel products, but they are manufactured differently. Plywood uses bonded veneers with grain directions alternating between layers. OSB uses layers of wood strands or flakes arranged in controlled orientations. Those descriptions identify the materials; they do not determine whether a particular sheet is adequate for a particular roof.
Nominal thickness is not always the stamped performance category
The fractions used in conversation may differ from the performance category shown on a product:
| Common description | Performance category often encountered |
|---|---|
| 1/2 inch | 15/32 inch |
| 5/8 inch | 19/32 inch |
A commercial roofing guide identifies 1/2 inch with 15/32 inch and 5/8 inch with 19/32 inch, while cautioning that its thickness recommendations are only starting points. Read the panel stamp and purchasing documents rather than assuming an informal “half-inch” or “five-eighths-inch” label describes the exact manufactured thickness.
More importantly, thickness is only one input. Panels of similar measured thickness can have different permitted applications because their grades, span ratings, construction, or certifications differ. Selection also depends on:
- Panel grade
- Roof/floor span rating
- Strength-axis orientation
- Edge support
- Continuity over supports
- Dead, snow, wind, and construction loads
- Fastener type and spacing
- Exposure classification
- Finished-roof requirements
- Locally adopted code provisions and amendments
Capacity and stiffness are different questions
Structural capacity asks whether a panel satisfies the applicable strength and deflection criteria under the design conditions. Serviceability concerns how the deck behaves in use—for example, how much it flexes under construction traffic or whether unsupported edges feel springy.
A panel may satisfy a prescriptive baseline yet feel less stiff than a thicker compliant alternative. That does not by itself make the thinner panel unsafe. Conversely, extra thickness does not prove that a panel has the correct grade, rating, orientation, support, or fastening.
This distinction explains much of the 1/2-inch-versus-5/8-inch debate: one option may be permitted while the other offers a serviceability upgrade.
Plywood and OSB should not be treated as interchangeable solely because their nominal thicknesses match. Compare each product’s stamp, grade, span rating, performance category, installation instructions, and compatibility with the selected roofing system.
How to read the panel stamp and span rating
Before accepting roof sheathing, photograph or record the stamp. At minimum, identify:
- Material and grade
- Performance category or stated thickness
- Roof/floor span rating
- Exposure classification
- Strength-axis direction or orientation instructions
- Certification or applicable product standard
A generic stamp-reading concept—not a manufacturer-specific label—might look like this:
RATED SHEATHING             ← grade/use designation
32/16                       ← roof/floor span rating
PERFORMANCE CATEGORY 15/32  ← manufactured thickness category
EXPOSURE 1                  ← glue-bond exposure classification
STRENGTH AXIS →             ← required orientation
Actual labels vary in wording and layout.
What 24/16, 32/16, and 40/20 generally mean
For a two-number roof/floor span rating, the first number generally indicates the maximum roof-support spacing in inches under the rating’s specified installation conditions. The second concerns floor use. A 24/16 label therefore generally indicates a 24-inch roof span and a 16-inch floor span under the applicable conditions. InterNACHI’s inspection guidance on roof panel sheathing describes this interpretation and emphasizes orientation and support assumptions.
A 24/16 label is not a promise that the panel will work over framing spaced 24 inches on center under every snow load, wind load, covering weight, orientation, or edge condition. The installation must reproduce the conditions behind the rating, and unusual loads may require calculations.
Exposure classification is not a capacity rating
A panel can have the required exposure classification yet remain unsuitable because its grade, span rating, thickness, or installation is inadequate. An adequate span rating likewise does not excuse an inappropriate exposure classification.
Orientation matters
The strength axis normally runs perpendicular to rafters or trusses. For typical plywood, that generally places the long dimension across the supports. Another orientation may be used only when the approved design relies on data and detailing appropriate to it.
Do not rotate panels merely to reduce cutting. The rating or governing table may assume that panels:
- Run with the strength axis perpendicular to supports
- Continue over a specified number of spans
- Have supported edges where required
- Meet a minimum panel width
- Use a prescribed fastening pattern
Matching the fraction printed on a receipt is not enough when these field conditions differ.
Thickness and span examples for 16-, 20-, 24-, and 32-inch support spacing
The following are limited examples reproduced from Illinois Building Code 2021 Table 2304.8(3) by a third-party code aggregator. They are not nationwide requirements or a generic shopping chart.
| Panel roof/floor span rating | Listed panel thicknesses | Maximum roof span with edge support | Maximum roof span without edge support |
|---|---|---|---|
| 16/0 | 3/8 inch | 16 inches | 16 inches |
| 20/0 | 3/8 inch | 20 inches | 20 inches |
| 24/0 | 3/8, 7/16, or 1/2 inch | 24 inches | 20 inches |
| 24/16 | 7/16 or 1/2 inch | 24 inches | 24 inches |
| 32/16 | 15/32, 1/2, or 5/8 inch | 32 inches | 28 inches |
| 40/20 | 19/32, 5/8, 3/4, or 7/8 inch | 40 inches | 32 inches |
The cited table also supplies load columns and footnotes that are not reproduced here. It applies to panels at least 24 inches wide, continuous over two or more spans, and installed with the strength axis perpendicular to supports. Consult the complete adopted table, its footnotes, local amendments, and the panel documentation before using any row for design.
Several lessons follow.
First, the table includes a 16/0-rated 3/8-inch panel at a 16-inch roof span and a 20/0-rated 3/8-inch panel at a 20-inch roof span. This proves only that those rated-panel configurations appear under the table’s stated conditions—not that generic 3/8-inch plywood is suitable whenever framing is closely spaced.
Second, edge support can alter the listed span. For the 24/0 example, the maximum falls from 24 inches with edge support to 20 inches without it. The displayed 24/16 entries list 24 inches with or without edge support under the table conditions.
Third, different thicknesses can share a span rating. The 32/16 row includes 15/32-, 1/2-, and 5/8-inch panels because the rating applies to a qualified panel product, not thickness in isolation. Grade, panel construction, qualification, and installation conditions contribute to the result.
The reverse is also true: measuring an unknown panel at approximately 1/2 inch does not establish a 24/16 or 32/16 rating. If its stamp is missing or illegible, thickness alone cannot reconstruct its capacity.
Practical field starting point
For conventional conditions, rated 1/2-inch plywood is commonly considered over supports at 16 inches on center. At 24 inches on center, 5/8 inch is often preferred as a stiffness upgrade. These are field conventions reflected in commercial and supplier guidance, not substitutes for panel data, code review, or engineering.
At 20-, 24-, or 32-inch spacing, do not select a thickness by interpolation. Use a panel whose documented rating and installation conditions fit the actual span and loads.
Loads and roof coverings that can change the selection
Support spacing is only the beginning of roof-deck design. Snow, wind, dead load, geometry, concentrated construction loads, edge conditions, and the finished roofing assembly can govern.
Snow and long-term deflection
A professional engineering forum discussed a roof with an approximately 80 psf snow load, 24-inch-on-center trusses, and customary 1/2-inch CDX plywood carrying a 24/0 rating. The designer reported that the panel did not pass the designer’s bending check. The high-snow-load discussion did not establish a final engineered thickness; it illustrates why a familiar span rating may not resolve an unusually demanding load case.
Potential responses include thicker or differently rated sheathing, closer truss or rafter spacing, added support, or a different assembly. None is universally least expensive. Closer framing adds members and labor; thicker panels add material cost and handling weight. Compare complete assemblies rather than treating decking and framing as unrelated purchases.
Snow-region design must use the applicable project load rather than a broad label such as “snow country.” Where geometry, drifting, heavy finishes, or other special conditions fall outside prescriptive assumptions, obtain a project-specific structural determination.
Tile, slate, and other heavy coverings
Slate and clay tile can add substantial dead load compared with lighter coverings.
A thicker deck may be appropriate, but the evidence does not support prescribing 3/4 inch merely because the finish is tile or slate.
Standing-seam metal
Metal roofing does not automatically require 5/8-inch plywood. In an assembly-specific Green Building Advisor discussion involving standing-seam steel over trusses at 24 inches on center under moderate stated loads, an editor considered 5/8 inch preferable for stiffness but not necessary for that described roof. The archived Q&A also contains conflicting opinions about edge clips beneath metal roofing.
That is practical commentary, not a design rule.
Wind uplift
Thicker sheathing alone does not establish wind-uplift resistance.
Follow the jurisdiction-specific schedule and approved construction documents instead of changing panel thickness while leaving critical connections unverified.
When to escalate the decision
Seek a structural engineer’s determination—and clarify code questions with the building official—when a project involves:
- High snow or drifting potential
- High wind or wind-borne-debris requirements
- Slate, clay tile, or another heavy covering
- Unusual support spacing or panel orientation
- Nonstandard roof geometry
- An uncertain or missing panel stamp
- Visible structural deflection
- A diaphragm function beyond ordinary prescriptive assumptions
- Any departure from the conditions behind the applicable span table
Installation details that must match the selected panel
Correct thickness cannot compensate for incorrect installation. A roof-deck specification should address orientation, layout, edge treatment, panel spacing, fastening, and inspection before concealment.
Orientation and layout
Unless the approved design says otherwise, install the strength axis—and typically the long dimension—perpendicular to rafters or trusses. Arrange panels to achieve the continuity required by the applicable design or table, and stagger joints where the approved installation documents require it.
Panel ends and cut edges must receive the support required by the design. Do not substitute narrow scraps for properly laid-out structural panels unless the approved details allow them.
Edge support
Edge support can include:
- Solid blocking
- Tongue-and-groove panel edges
- Approved panel-edge clips where permitted
- Another system recognized by the governing design
Whether support is required depends on the panel, rating, span, table, and assembly. The Illinois examples show why it matters: the listed span for a 24/0 panel changes from 24 inches with edge support to 20 inches without it, while the 32/16 example changes from 32 to 28 inches.
Edge support cannot make an inadequately rated panel suitable for excessive loads, correct the wrong orientation, or replace deficient fastening.
Avoid blanket rules about H-clips beneath metal roofs. The available field commentary conflicts, and surface irregularities may be visible through some metal systems. Use clips only when the approved panel installation, structural documents, code, and roofing system permit or require them.
Panel gaps
InterNACHI’s inspection-oriented guidance calls for approximately a 1/8-inch gap at panel ends and edges. Treat that as general context, not a universal requirement: the panel manufacturer’s instructions and approved documents control. Self-spacing panel profiles may have different placement directions.
The objective is to reproduce the specified spacing consistently, not to improvise a larger gap.
Fastening
The same inspection guidance gives an example for panels from 3/8 through 1 inch thick: 8d common nails at 6 inches along panel edges and 12 inches at intermediate supports, with fasteners at least 3/8 inch from panel edges and driven flush. It also notes that high-wind conditions may require closer spacing.
This is not a universal fastening schedule. Governing documents may change:
- Fastener diameter, length, coating, or shank type
- Edge and field spacing
- Requirements at corners and perimeters
- Penetration into framing
- Diaphragm nailing
- Staple acceptability
- Fastening for the finished roof covering
Install fasteners to the approved detail and confirm that they engage the framing. Address overdriven, proud, misplaced, or missed fasteners as directed by the governing installation requirements.
Contractor-verification checklist
Before underlayment conceals the deck, verify that:
- Panel stamps match the approved submittal or specification
- The strength axis is correctly oriented
- Ends and required edges are supported
- Joint layout follows the approved documents
- Specified gaps are present
- Fastener type, penetration, edge distance, and spacing are correct
- Fasteners are installed to the required depth
- Damaged or delaminated panels have been addressed
- Deck flatness meets the roof-covering requirements
- Underlayment and flashing are compatible and correctly sequenced
- Required inspections occur before concealment
Existing 3/8-inch decking and mixed-thickness repairs
Questions about existing 3/8-inch decking involve three distinct projects: leaving a sound deck during reroofing, replacing isolated damaged panels, and completing a full redeck.
Leaving sound decking during reroofing
Existing 3/8-inch sheathing is not automatically defective merely because thicker products are common. Its acceptability depends on:
- Whether it is a rated structural panel
- Framing spacing and edge support
- Physical condition and deflection
- Actual roof loads
- Proposed roof covering
- Fastener performance
- Local reroofing provisions
- Roof-system substrate requirements
Inspect for rot, delamination, broken plies, water damage, excessive openings, pulled fasteners, and deflection between supports. Try to identify the panel stamp from the attic. If the stamp is missing, further investigation may be necessary because a thickness measurement does not establish the rating.
The roof-covering manufacturer may impose separate substrate requirements.
Replacing isolated rotten panels
Installing nominal 1/2-inch replacement panels beside nominal 3/8-inch existing panels creates a nominal 1/8-inch elevation difference. That difference is a detailing issue even if both panels are otherwise acceptable.
An abrupt transition may produce an uneven substrate or become visible through the finished roof. Its significance depends on the covering, underlayment, transition geometry, panel layout, and allowable deck tolerances. The available evidence does not establish that every mixed-thickness repair shortens roof life.
A community discussion of a 3/8-to-1/2-inch repair illustrates the disagreement. One contributor suggested progressively wider strips of roofing felt to ease the transition, but that suggestion is anecdotal—not an approved universal detail.
Before mixing thicknesses, obtain an accepted transition detail from the responsible contractor or designer and verify it against the roof-covering instructions and local requirements. Do not improvise a taper without confirming its effect on support, moisture management, fastening, and substrate tolerances.
Completing a full redeck
Uniform replacement deserves consideration when deterioration is extensive, deflection is widespread, panel ratings cannot be established, deck surfaces are incompatible, or the selected roof system requires another substrate.
Do not order it solely because one old panel measures 3/8 inch. Base the scope on condition, compliance, compatibility, and whole-project cost.
A seven-step specification and verification checklist
A defensible roof plywood specification can be developed in seven steps.
1. Measure the framing spacing
Measure rafter or truss spacing on center, not by estimating the clear gap. Check multiple locations, especially around additions, valleys, transitions, and older construction where spacing may change.
Identify skipped supports, damaged framing, cantilevers, out-of-plane members, and locations where panel ends do not land on framing.
2. Identify the governing code and amendments
Determine the code edition actually adopted by the jurisdiction rather than assuming the newest model code applies. Check amendments involving reroofing, snow, wind, wildfire exposure, roof coverings, diaphragms, and inspections.
For an existing building, determine whether the work is classified as a repair, alteration, reroof, or structural replacement. Direct unresolved compliance questions to the local building official.
3. Establish the design loads
Obtain the applicable dead, snow, wind, and other design loads. Do not substitute broad climate descriptions for project values.
Include the covering and relevant assembly components. For drifting, unusual geometry, heavy finishes, concentrated equipment, or high uplift, obtain calculations from a qualified structural professional.
4. Check the complete panel stamp
For each proposed product, verify:
- Plywood or OSB
- Grade
- Performance-category thickness
- Roof/floor span rating
- Exposure classification
- Strength axis
- Applicable certification or product standard
- Manufacturer instructions
Reject substitutions based solely on nominal thickness. An unrated or incorrectly rated 1/2-inch product is not equivalent to specified rated 1/2-inch sheathing.
5. Match the installation assumptions
Confirm agreement among the design, panel documentation, and field installation on:
- Strength-axis orientation
- Number of spans and continuity
- Required panel width
- Blocking, tongue-and-groove edges, or clips
- Panel-end and edge gaps
- Fastener type and spacing
- Fastener edge distance and framing penetration
- Diaphragm or shear-transfer requirements
- Treatment at hips, valleys, ridges, eaves, and openings
A table value is useful only when its assumptions are reproduced in the work.
6. Check the roof-covering instructions
Review the current instructions for the selected shingles, standing-seam metal, exposed-fastener metal, tile, or slate system. Confirm permitted deck materials, substrate requirements, flatness tolerances, underlayment, attachment, and warranty conditions.
This step is particularly important when repairing mixed-thickness decking or changing covering types. A deck accepted for one system may not provide the surface or attachment required by another.
7. Compare compliant options as complete assemblies
After code, engineering, panel data, and roof-system instructions identify the permitted choices, compare:
- Thicker decking versus closer framing
- Material and installation cost
- Panel weight and handling
- Desired stiffness under construction traffic
- Potential visibility of joints or waviness
- Blocking and edge-support labor
- Availability of the specified rated product
- Demolition and transition requirements during repair
Do not assume that the thinnest compliant panel is the best value or that the thickest available panel is automatically better. Extra thickness can improve stiffness, but it adds cost and weight and cannot correct unrelated design or installation defects.
Use this decision hierarchy:
- Code and structural design establish what is permitted.
- Panel data establish capacity under stated conditions.
- Roof-system instructions may add substrate and installation requirements.
- Serviceability, constructability, availability, and budget choose among compliant options.
For a conventional roof, this process may support rated 1/2-inch plywood at 16-inch spacing or favor 5/8 inch at 24-inch spacing. It may also lead to another rated panel or framing arrangement. Roof plywood thickness should be the result of verification, not a substitute for it.
Is 1/2-inch plywood thick enough for a roof?
It can be. Rated 1/2-inch plywood is commonly considered over framing at 16 inches on center when its grade, span rating, loads, orientation, support, fastening, local code, and roof-covering instructions permit it.
Do not automatically carry that answer to 24-inch spacing, high snow, heavy tile, high wind, or an unstamped panel.
Do rafters or trusses spaced 24 inches on center require 5/8-inch plywood?
Not universally. The cited Illinois table includes some thinner rated panels at a 24-inch roof span under defined conditions. However, commercial and supplier guidance often favors 5/8-inch plywood at 24 inches on center for greater stiffness and reduced deflection.
The project may require 5/8 inch, permit a thinner rated panel, or call for another solution depending on loads, panel data, installation, covering, and jurisdiction.
What does a 24/16 span rating mean on roof sheathing?
The first number generally indicates a maximum roof-support spacing of 24 inches under the rating’s specified installation conditions. The second concerns floor use at 16-inch support spacing.
It is not an all-load guarantee. Orientation, edge support, continuity, grade, fastening, loads, and the applicable table or manufacturer data must still match the installation.
Can 3/8-inch roof plywood remain during reroofing?
Possibly. Existing 3/8-inch decking is not automatically unacceptable. Its rating, support spacing, condition, deflection, loads, fastening, covering compatibility, and local reroofing rules determine whether it can remain.
Damaged or inadequate panels must be addressed. If repairs use thicker sheets, the resulting elevation difference needs an accepted transition detail.
Is plywood better than OSB for roof sheathing?
Neither is categorically better for every roof. Both may serve as structural roof sheathing when the specific product is properly rated and accepted for the application.
Compare the actual grade, performance category, span rating, exposure classification, installation instructions, moisture-management plan, availability, and roof-covering requirements. Matching nominal thicknesses do not make plywood and OSB structurally interchangeable.